As I knew I was going to be very busy with the Debbie edit, I wanted to make sure the animation for Anxiety Dance would have sufficient attention. To assist Shahid with animating the branches, I created a (very loose) instruction manual that included everything I wanted to achieve from the animation, alongside diagrams and descriptions that I drew in Photoshop of how I envisioned the branches' movement and style. Although, I did make it clear that this was only for Shahid to follow as a rough guide, and if he figured in the process that things worked better done in a different way, I was happy for him to make those changes. Here are my descriptions : 


Unfortunately, due to limited time, Shahid wasn’t able to complete the branch animation, but got a very rough version of the first 28 shots started and as a result I offered to take over on his behalf, as at this point the Debbie edit was finalised. However, this meant I had to learn how to animate the branches very quickly within a small time frame using After Effects, and I was worried that my skills were not good enough to work efficiently. Luckily, having done the animation of the Indiegogo trailer for Through the Medium in a similar fashion, I had already some knowledge of the process, and alongside support from Thomas’ technical skills whenever I had problems, I was able to pick up the skills very quickly. Here is a brief time lapse (feat Lucy's draft of sound) of me working on placing the branches and beginning to animate them for a particular shot :


In short terms, to get the branches and camera movement to correlate with each other, I created a "Null object" which I used key points to track either a mark on the green screen or a part of the dancer that stayed within the frame. The branches were then parented to the "Null object" and tracked alongside its movement. To make the branches appear in the background I placed them underneath the layer that contained the dancer and added a "camera lens blur," adjusting this depending how far back I wanted the branches to appear. Adjusting the size of the branches also assisted with this, making them larger the closer to the camera I wanted them. The movement of the branches was done using the puppet tool which moved various parts of each branch, kind of acting as different limbs. This was recorded in the video using key points on the timeline.

The animation still took a lot longer than expected, and as I hadn’t scheduled in that I would be animating for Qualia, some time from Through the Medium got taken away unfortunately, which pushed us back quite a bit after final edit was finished. It was also a race to get a rough version of the branches done for Lucy in order to do the sound design for the piece, which added quite a lot of stress. However, I’m glad that the situation did occur, as now my confidence has grown a lot in using software such as After Effects.
Due to the hot conditions of our room during the stop motion shoot it meant our character and set would often melt, and time had to be spent fixing this every so often, for continuity purposes as we didn't shoot the scenes in a linear manner. However, there was only so much we could do to get it looking similar throughout, so we thought to assist this we would fix things up ever so slightly in post. This was a really subtle thing, done only on shots that had patches that were really messed up and required a bit of fixing. I wanted to make sure Clay's textured skin was still on show though, and the indentations and changes as an effect of us touching / moving him could still be visible in order to contrast with the very smooth CGI universe. 

To do this I used NukeX, using the blur tool. This allowed me to focus on only particular areas that needed attention, and change the opacity of the blur to low so as the smoothing was very slight. I'd never used NukeX before, so this was a learning experience for me and I now feel more confident using the software. 

Before
After

Here is a time lapse of my working method, as I smooth each frame :

My Role Experience

For me, as an editor, the production stage was a lot about observing the footage in real time in order to understand the story and shots better, developing a familiarity with these to assist in the editing stages of post production. I would frequently look back and forth between the monitor featuring the camera view and the live action happening on the set. This was in order to establish a relationship between what the camera was capturing and any details that were not within the frame that could be useful knowledge to also later assist me, when choosing certain takes or angles over one another. 

In between shooting, my job was to transfer and log the footage, looking after the cards during the process and ultimately returning them to the camera and sound teams. Conveniently, this could occur as cast and crew took breaks, allowing us to use time efficiently and meaning the cards never really became full while in the middle of shooting. Below is a documented version of my log sheet :


I'd never done anything with logging footage before, and this experience allowed me to increase my skills in this department, learning how to use the software Shotput Pro (version 5) in order to do so. I was a bit anxious about messing up something during this process, and I felt a lot of responsibility, as I knew if some footage didn't save or wasn't easily accessible, it would be my fault and I didn't want to ruin the film! However, taking a reasonable amount of time to ensure everything was working correctly (however still working efficiently to maintain a reasonable time schedule to not put production at a halt) and making sure that I understood the process and software well enough, meant that I was confident everything had been transferred and logged successfully.

As a side role, I assisted on continuity last minute when Julia was not available. However, this was a very minor role on my part, which I found incredibly difficult to pick up at times, once again never having done it before. I found it hard to switch from an editor's perspective to being thrown into a continuity perspective, and trying to pick up where someone else had left off and remember details that I hadn't really been looking for before. However, I did try my best and it's definitely gained me an experience.

My General Experience


Similarly to the set build, it was quite a lot of stress for one week during the shooting of Debbie! At times I feel like everyone felt very tense, however I feel this was mainly because of our limited time available to get everything shot and completed. A lot of the days, we were very behind schedule, and we all had to stay and work much later than originally intended. It meant all systems were go pretty much all the time, which was very exhausting. However, I'm glad we were able to stay a lot later and spend more time on achieving what we wanted, because I'd rather the film got finished and be tired than it not and have left on time every day! Despite the stress, I think we all knew it was what was needed for the film, and so we were all willing to go beyond ourselves each day to achieve it. There were a lot of fun times as well on set - a lot of classic DFSA banter between the crew, funny outtakes from the cast - which made the days go by a bit faster and helped us keep some sanity in amongst the chaos! I think the whole production process has been a learning experience for all of us in many different ways, and definitely a big part of the learning process has been developed around solving problems and not letting them cause the production to completely fall apart. There's always going to be some problems, sometimes many problems, but it's how you deal with them when you're out in the field that allows you to learn the best and move on from them, and I think during Debbie this is something that all of us were able to manage and deal, even those at times it was difficult. 
Before production could properly get underway, we spent about 5 days preparing and building the cafe that would be our set, aiming to look something like Shahid's amazing concept art, as seen below.


Luckily, with help from various friends from our class, this job was made a lot easier, and the work was divided among ourselves. However, even with the extra help, we were still not the largest group, which meant we all had to work extra hard in order to finish the build within such a limited time frame.

I tried to help with the build in areas that I know I'm a bit stronger in, which meant I ended up painting quite a bit throughout the process (there was a large amount of painting required luckily enough!). My main focuses to begin with were painting doors and shelves, making sure these got enough coats to remain opaque and not patchy, as small details like this were likely to show up on camera later and limit the quality of the final piece. I also assisted with painting the three walls the yellow / mustard colour, eventually moving on to spend a lot of my time painting the design on the feature wall. Due to budgetary constraints the feature wall had to be all stencilled and hand painted, rather than properly wallpapered and so this required a mini team of people to actually carry out. It took time in order to make each oval shape within the layers as precise as possible. However there's only so much accuracy you can get with a human hand and so no design was completely perfect. Despite this I think the wall turned out as well as we could get it, and the inaccuracies added to the feel of the rustic, worn down cafe that we wanted. Doing the feature wall also meant I had to stand on ladders, which I'm not a big fan of, however I managed to face my fear in order to help get it finished!


Even though the build was quite a stressful time, it was also quite a lot of fun! I learnt a lot of new skills throughout the process, and definitely brushed up on some fine art skills! It was really nice seeing everyone coming together to start to bring the story of Debbie to life and I think what we were able to do in just a few days, really speaks for our hard work. Of course the set wasn't perfect, but then rarely anything is, especially when done by hand. However, with our limited time constraints and funds I think we did as best we could to make it look good. 


This is the first test of what a final stop motion shot could look like. We played around with colour, sound and the background (the transition between the sky into a blue screen within the real human world). The rig and wires that hold Clay up in his various positions, as well as the lower half of the arm, have been roughly masked out, however this will need a tad more work to remove the light shadow which has been left as a result. This shouldn't be a problem though and I'm happy with the progress made, since it is only a test. 
When we got to the room it took quite awhile to set up and arrange everything so that it would fit in the film editing room i.e. the space where we're working (it's quite small even without the equipment in it!). We also spent some time on the first day attending to the models after travelling, such as smoothing the skin out a bit more and re-arranging clothes to sit nicer on the body etc in preparation to get straight into shooting the next day. The room is set up with two lights on the left hand side at varying heights (acting as the sun), a tray holding the model on a rig, the set placed at a further distance away on the editing table, a blue screen behind the set for a digital sky in post, a tripod and camera directly in front of both model and set, the laptop with dragonframe running connected to and controlling the camera and a monitor for the animator to view positioning the model each frame. This can be viewed below :


We start animating a scene by looking at the animatic as seen in this screenshot : 


This gives us a better idea of what will be happening in the scene for us to replicate. 


At each frame (we're working at 25 fps) Tom had previously written down the syllables (taken earlier from our work on the indiegogo trailer) and over how many frames each movement would be over. In the screenshot below the big "E" alongside the arrow represents eyebrow movement (up or down) and the big "H" represents head movement. Seeing this at each frame allows us to work faster and generally better as we don't need to flick back and forth between the animatic and the live view etc. Also as shown below each sound can be heard at each frame, making it easier for us to place accurate mouths based on how Lawrence said certain words. 


This is the end of our first week of shooting, having about another week and a half remaining. I think we've learnt how fiddly stop motion can be (replacing mouths, fixing finger pressed skin, slight movement changes etc.) and even though I knew it'd be time consuming actually living it has reinforced this to me even more. We've been roughly arriving at 10am every day and most of the time working until 8pm when the caretaker often comes and tells us we're "the last ones in the building." Each day we're getting around 2-3 scenes done, each being about 5-7 seconds long.  We've had a few set backs (a light bulb blew, a hand fell off and a piece of hair snapped in two at one point) but we've always managed to work around them. Even though we're really exhausted (I can't stress this enough!) it's been so worthwhile and really fun at the same time. It's very rewarding seeing the character actually coming to life and noticing how our hard work has actually made this happen. Normally I'm very self critical of my work, but at the moment this isn't too bad! (I hope).


So let's hope the rest of the shoot goes smoothly! (eeeeep)


This armature was built in a similar fashion to the wire one in my previous post. Unfortunately I didn't get a lot of pictures of the process of building it, as all of my time was devoted to making it. I actually found this armature easier to build, despite it looking a lot more complicated, as no wire had to be cut to measurement etc. It was all about securing the ball and sockets to each other (using loctite adhesive. Once built, I applied the same foam onto the armature, securing with tape, to beef out the model while still maintaining flexibility and good movement. As seen in the photos, the armature only reaches to the end of the upper arm - this is because the lower arm and fingers are made using 1mm aluminium wire (in exactly the same way as my previous wire post). This is to allow adequate movement in smaller, more fiddly areas, not making the hands too big for the body. The lower arm was attached to the upper using loctite again. 


Requirements
  • 1.5mm aluminium wire (for legs and body)
  • 1mm aluminium wire (for arms and hands)
  • 2 joints (for breast and hip)
  • 2 steel with brass feet
  • 1 joint (for head)
  • 10 grub screws
  • 2 M5 bolts
  • 2 M5 washers
  • 2 M5 wingnuts 
  • Pliers 
  • Scissors


To make legs for the model, 3 1.5 aluminium wires were wrapped tightly around each other using 2 pliers. This was to add more strength and stability for when heavy clay is added later. 


A joint was place between the two legs to connect them and secured using some grub screws. The feet were also added in a similar manner at each end to make the model stand upright with no help.


Using 5 1mm aluminium wires, and using the pliers again, these were wrapped around each other tightly to make arms, leaving the ends free to be spread for fingers. 


A piece of wrapped (using three pieces of 1.5 mm) aluminium wire was placed into the hip joint and secured with a grub screw in the centre - the torso.


Joints for the head and breast were added, attaching the arms with 2 grub screws (one on either side). These were bent in a way to create shoulders, as seen in the photos. 


So as to not make the model too heavy, I added a light foam to the body, moulded around the ligaments and secured with tape. This means the model's body is plush, while the head, lower arms, hands and feet will be made of clay. 


The final model should measure around 270mm in height without the head, estimating 300mm with the head. This entire process was repeated a second time, creating two out of three models for the final production. 


After we did the trailer shoot, I took the files and edited a trailer in Avid for the Indiegogo page for Debbie. This consisted of a teaser trailer, followed by a pitch done by Lucy to give more information about the film and what we need.


The final edit can be viewed here :

For the Indiegogo page, I was in charge of compiling everything together and placing it in a relevant, interesting order. 

Firstly I had to come up with a tagline, that would promote the project and gain interest from the public when viewed on the home page of Indiegogo. I quickly summarised the project into a question to get the audience's attention and make them wonder more about it : "What is a day in the life on an animated character like? We want to find out and we hope you do too!"

For the main section of the page, after observing what other successful films that were similar to our own, had pitched, I came up with a running order as follows :

1) An interesting and quirky introduction, that is relevant to the film and talks directly to the audience. 

I wanted to set the scene with this section, giving a bit of a back story and showing our main aim for the film - to give characters a voice! It was written in a way that hopefully speaks more directly to the audience, to try and immerse them within the our film's world.

2) The Synopsis 

This was next on the list obviously to give a brief outline of what will actually happen in the film to the audience. 

3) Meet the Characters 

After so much work on characterisation I wanted to give the characters a proper introduction to the audience, by describing a short paragraph for each. This hints at events that happen within the film and acts as a bit of a teaser, as well as allowing the audience to get a sense of the personalities of the characters. Concept art for both CGI and Stopmotion is included in this section. 

4) Meet the Humans

I thought "Meet the Humans" would be a funny title after the previous one, playing on our reflexiveness within the project. I read on the Indiegogo website advice section about how it is good to introduce your crew, even in a personal manner, as people can often donate to people rather than projects. I thought personal statements would be a good idea for the audience to get to know us better and our relation to the film, so I wrote one for me and also for Katherine based from her learning agreement when she couldn't, and made Tom complete one as well. I hope the audience can see our passion for the project in these and it helps with the decision of whether to donate or not.

5) What we've already done...

Letting the audience know how far we have come so far and where we are at with the project. 

6) What we still need to do...

A time chart showing where we are and everything ahead of us. A short description about this as well.

7) Budget

This will show where the money will go to in bettering our project. A pie chart is also here to give a quick indication.

8) Perks 

A graphic version of the perks and a brief description of why we are giving what we are. 

9) Other ways to help...

Publicising us on social media and thank yous. 


Idea

I thought since our film is animation based it would be nice to do our trailer in a similar fashion and use animation. So far we have used quite a lot of graphics, such as of the characters, throughout much of our presentation materials (production pack, presentation etc.) and thought we could make use of them in the trailer. I thought about how we are bringing the animated characters of Chip and Clay into our world in Through the Medium, and how maybe we could reverse that to turn ourselves into animated characters and be a part of their own world, such is the reflexive nature of what we're trying to do.

Trailer Inclusions :
  • Motion graphic style animation 
  • Say my name, role and name of film
  • What the film is about
  • Talk about how the concept was developed
  • Introduce the characters - Clay and Chip 
  • How much money we will need
  • What it is going towards 
  • Thank you 
Based off of these bullet points I came up with a few paragraphs to include in the trailer and then we recorded me saying them to be put in the trailer. 

Animation and Lip Sync 

The trailer was animated in After Effects as seen below :


I'm very please with the result of the trailer, seeing as it was done in a very short time period - mainly working in the evenings for about a week. I think the style works well for what we're aiming to do and how the characters interact with it as well. It's amazing sometimes to see what can be done when you really knuckle down to something - hopefully all our efforts and passion for the project are being injected into everything we do, such as the trailer. 

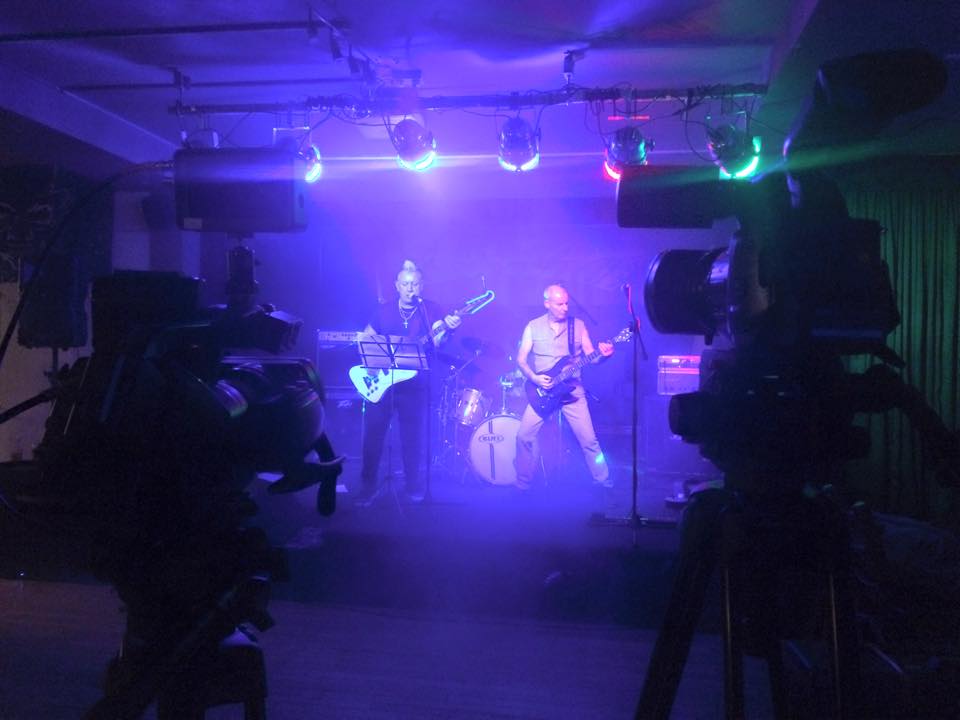
Josh asked Tom and I to help out with camera work for his documentary film, which I was very excited about as I find his project really cool and something I'd be really interested in! It meant we got to tag along and watch the performances and meet some band members which was super awesome! More film - wise it allowed me to test my camera skills on the EX1 - camera being something I haven't really been on other than in workshops and my own personal projects etc. It was nice being able to try something different and go a bit out of my normal comfort zone from roles that I've become more acquainted with. I had a great time and hopefully helped Josh a tiny bit on his way to accomplishing his amazing project!


Feedback

  • Think about how the vines and branches relate to anxiety, what we want to say with them and how to incorporate them into the film.
  • Is the piece meant to be fairytale - esque? 
  • Are we going to use an infra-red style or use elements from infra red?


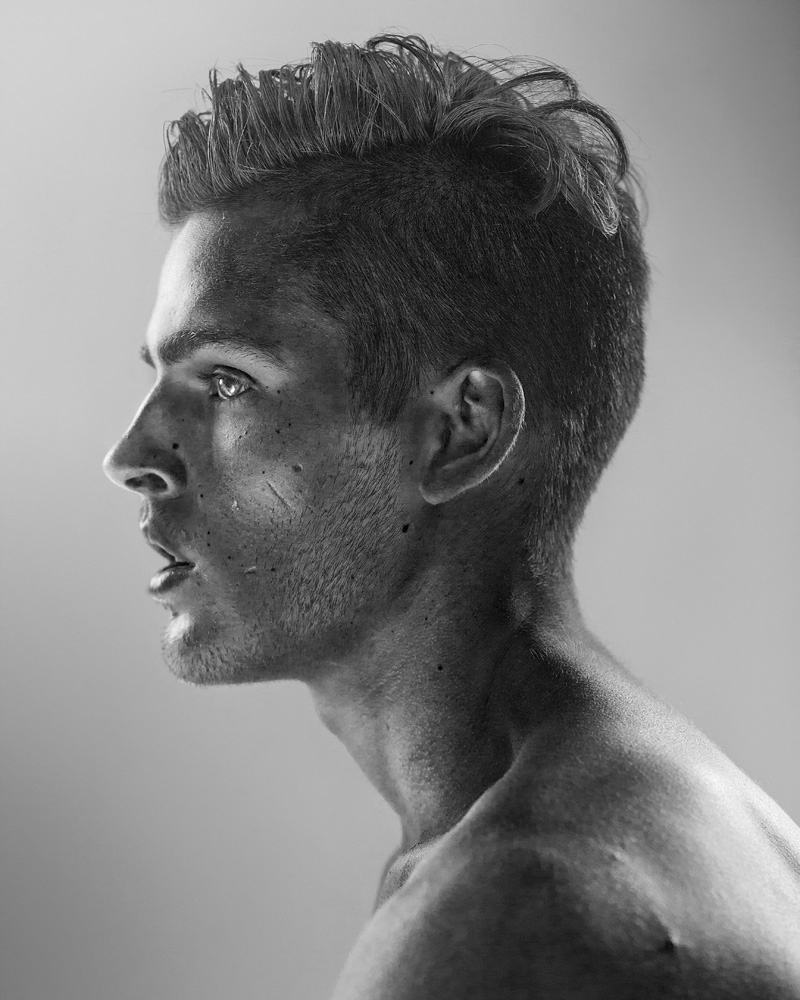
Inframen is a series of portraits using an infrared technique that reveals blemishes that lie under a dancer's abused skin such as scars and sun damage. The photographic process strips away the dancers' outer shell, exposing hidden flaws - the surface of the skin becomes a metaphor for the dancer's inferiority. It represents the relationship between the strength of the body and the fragility of the soul while using male dancers subverts the heteronormative idea of emotionally suppressed masculinity. 

"I use this infrared technique to challenge the model's beauty and find a great intimacy. You are seeing what is already there but it reveals and emphasises these marks."

I think this is a great inspiration for looking at male dancers and challenging the male stereotype. In Inframen we can see that despite their beauty and strength, there are flaws underneath and that everyone has them. This relates back to our film to try and subvert the idea of men always being these strong, fearless characters that are meant to protect, and in reality are just as susceptible to "flaws" as women, despite that this may be seen to be overlooked. 


After our brief tutorial with Kathleen we discussed about what gender we wanted the dancer to be and how this would effect what we are trying to say with the piece. We thought how it would be interesting to use a male dancer as a subversion of stereotypes. I wrote this brief summary to outline the new idea for the film : 


A 5 minute contemporary dance film featuring a young man, aiming to explore and challenge the male stereotype of having strong, fearless characteristics by contrasting with a quivering wreck. The choreography is based around an analysis of anxious states and the movements they create, their exaggerated sounds creating a sort of rhythm. This will be done through the use of live action and animation, in which the dance represents fear and panic, while the animated branches reflect pressure and problems, ultimately closing in on the dancer. 

I also came up with a revised mood board, as previously the focus was very much on women, while now we want to concentrate on men and how they can be viewed through the camera. 


Stylistically we still want the visuals to be black and white, consisting of a light grey background. This is so we can contrast with the much darker vines and branches. 
We wanted to make our production pack reflect the style of the film, making use of colours and shapes, and in the process decided that it would be nice to have a logo / title that we can use on publicity websites, in the production book etc. 

As an initial draft, Tom presented me with a design that made use of the characters' heads in creating a shape around the title text. However I felt this was to clunky and didn't fully represent what the film was about - I felt something more simpler / clearer with an obvious play on the forms of animation would work better. 
Initial Draft


As a result Tom and I looked into how related items have been incorporated in titles in the past, and I created a mood board showing a variation of uses and effects to inspire us. 


With more research into what can be done with text, we revised the logo to incorporate our two main characters in what we feel is a more clever manner than before. Our stop motion character, Clay, can be seen incorporated into the "O" of "Through," while our CGI character's face (Chip) can be seen within the "D" of "Medium." We also included the use of an animator's hand for stop motion and a cursor for CGI, to put in more of a reflection of the film, hinting towards their individual mediums. The colours are also representative of the characters themselves, we associate Clay with various red items of clothing and accessories and Chip with blue, as can be seen within the concept art. These colours have been placed on the text in accordance with where the character is situated. The fact they are distinctly separated between the two words also reflects how the two characters are cut between (in the edit) within the film - they appear to be from separate universes of animation, yet still are linked. 


Final Logo Design


I thought as the production is giving a life to the characters, that I'd do the descriptions in an interesting, related manner - giving them mock interviews as if they are publicizing "Through the Medium" as the actors. This allows a further reflection of the medium, as they are essentially having a mini, even more realistic interview, about their role in our film in which they are interviewed about life on set. I feel their answers give a bit more away about their characters and attitudes, particularly to those who haven't seen the script. It serves as kind of a written teaser to our film. We thought this would be useful to put on fundraising sites, publicity pages and even as flyers to put up / hand out, as it is quite a fun part that plays off the rest of the entire work. Even if we don't use it as something public in the end, it's useful for us to look at to make sure we know as much about the characters as possible (their back story) to assist in putting their lives into their models in the best possible way.  Once the article was written, we turned it into a magazine style design and layout to add a bit more of a realistic interview vibe, that can be seen below, in the fake magazine Animation Nation 


Here is the original transcription of the article :

Clay

Clay was born on the 22nd July 2015. From a very early age, Clay was handled with a lot of love and care by his creators assembled with the most delicate of touches. After initial problems with his balance, requiring assistance to stand alone to prevent toppling over, he established a close bond with his human animator counterparts who he relied and worked with to rectify the problem into a more stable condition. He became a popular character within the workshop, and as a result grew to be a very social and friendly being. Clay considers himself to be a professional actor and takes his roles very seriously, however he always has time to hang out and have fun with the rest of the crew on breaks. Despite never gloating, if questioned, he will quietly confess his dreams of one day being the first animated character to attend the Oscars.

Here is a brief interview with Clay to get to know him better before the release of "Through The Medium."

Interviewer : How would you describe yourself? 

Clay : ...Oh...tough question! Mmmm...let me think. I'd say I'm a pretty patient character *chuckles* 

Interviewer : *chuckles* Well you'd have to be! 

Clay : Yeah definitely! It's a massive part of the job I'd say. I like to think I'm pretty chilled, the key to establishing a good work ethic is just to be friendly and have fun with the job. It's nice being able to have a few laughs every once in awhile with these guys *points towards film crew*

Interviewer :  Sounds like you have a lot of fun on set! Do you bring that into your personal life too? 

Clay : Yeah I would say so. I like to get a bit of socialising in behind the scenes as well, there's perks to working with some of your best friends! Seriously though, it is important to take a lot of breaks throughout production, especially when you're standing all day like I am. It's essential I get my stretching exercises in - it's part of the risk assessment! Off set I also enjoy watching a lot of films to draw some inspiration into my performances, although to be fair I like to incorporate a lot of my own style into the roles as well. 

Interviewer : What do you think of "Through the Medium"?

Clay : I really love the concept of the entire film. I feel like a lot of the time animated character's voices get lost in amongst the rest of the behind the scenes footage and it can get really frustrating, especially after all the hard work put in to make the performance good. I'm really hoping the film will provide the audience with some new knowledge of what it's like to be an animated character on set, working in adverse conditions when you're only a few inches tall and gain a new perspective on the film making life from a different angle. 

Interviewer : Rating out 10?

Clay : Do you even have to ask? *chuckles* 


Chip


Chip was born on the 20th of July 2015. In early stages of development, Chip had a rather unfortunate scenario with the so - called evil "Cursor" that left him muscle-less and nearly ruined his career in looking good for himself - he has lived in fear ever since. Right away Chip knew he was very athletic, and for one little CGI animation he had big dreams - to have the biggest muscles and smoothest surface in the entire of 3D space. Self appearance is a very important part of Chip's life, with around 16 hours spent in his mirror and the other 8 flexing in his sleep. However, various run downs with his Kryptonite, the "Cursor," often leave Chip in awkward situations and interrupt his  self titled flawless physique. Despite life not always going Chip's way, he knows he can always find some solace in his favourite coffee, the triple mocha frappa lacka macha chino latte and even occasionally him and the cursor manage to put aside their differences, showing it's not all tricks and games between them.

We also spent some time getting to know Chip! Here is the interview :

Interviewer : Hey Chip! How are you?

Chip : *Proceeds to fix hair in mirror* ...uuuhhh...I'm...Good...Thanks.

Interviewer : Great to hear! Can you tell the audience a bit about yourself?

Chip : *Immediately puts down mirror* Where do I begin? My favourite element of me has to be my award winning smile *Smirks* although my hair is pretty good too, perfect even! Wouldn't you agree?

Interviewer :  Yeah! Don't forget about those muscles though!

Chip : Oh trust me, I haven't. I've got a solid round of built up polygons. *flexes*

Interviewer : Nice! Do you use those muscles to stop any evil lurking about?

Chip : Mmm...there's not too much evil around here...other than the...the...the...

Interviewer : ...the?

Chip : NOOO! Nothing. Never mind...you'd better be careful or you'll soon find out! And neither of us would want that. The interview would have to be cut short.

Interviewer : Very well... If there's "not too much evil" I'm guessing the universe is a very positive place?

Chip : Definitely! How could a universe with me not be positive! Although the coffee contributes a lot of positivity, especially after a stressful day of running from...stuff...and gives me the energy to keep maintaining these dashing looks you see here.

Interviewer : And lastly can you describe "Through the Medium" to us to get a better sense of what it is about?

Chip : Sure! It's a glorious two hour feature length that delves deep inside the inner workings of my amazing body, displaying the craftsman ship of every chiseled high definition ab, my shiny radiant texture...

Interviewer : ...mmm...it's actually supposed to be a short, documentary....say around 3-5 mins?

Chip : Pfft you're wrong...that's obviously not nearly enough time to take in all of my stupendous action. You'll love it though, it truly is a work of art!

Interviewer : *Chuckles* I look forward to seeing that! Thank you Chip.


Stopmotion


My idea for Clay is to have him in warmer colours to represent his more physical, classic nature and relationship to the human world. This includes various tones of red, probably leaning more towards the mid-darker shades. Subtle hints of gold could be used, such as on buttons etc.

Related personality types to the colour red that fit with Clay are :
  • Optimistic and Courageous 
  • Practical and grounded attitude 
  • Explorers and pioneers of the world
  • Passionate and enthusiastic about life
  • Hard worker and enjoys physical labour


Related personality types to the colour gold / yellow that fit with Clay are :
  • Happy disposition / Cheerful
  • Creative - coming up with ideas
  • Smart dresser


I feel as Clay is aware of the human world and interacts with it, he understands the principles of dressing in a smarter way for work (providing his role calls for it). Therefore with his outfit I want a kind of "casual - chic" effect - not a complete suit and tie, but within professional standard boundaries. He is not an uptight character and his outfit should reflect his more casual - esque nature, so comfort and freedom for movement is essential. However, as he does express an interest in style within the film, he still has to withhold a look that makes him seem thoughtful to his fashion sense. 


CGI

For chip I wanted to express his relationship to technology and the CG universe, using more cooler toned colours such as light, icy blues and silvers. 


Related personality traits to the colour blue that fit Chip are :
  • Need for peace and harmony - doesn't like having his feathers ruffled (cursor)
  • Confident, but may be hiding a vulnerable side
  • Unpredictability overwhelms him
  • Can be quite emotional
  • Cautious and worry about everything
  • Prone to self pity

Chip's outfit is a lot more futuristic, mixing elements of technology, metal, space suits and superheroes - pushing him further away from the human world and acknowledging his lack of connection with them. This was a lot harder to find images on, however elements from this mood board provide a good basis to work from on creating something. I particularly like the use of the metal bands around the wrist and shoulders.