After listening to Vicky's advice from the tutorial, and focusing on how the water didn't have to be blue, Laura came up the idea of making it black instead as if the dancers are deep underwater. This would mean that we could use a black screen / curtain instead of a green one and hopefully lessen the amount of complicated effects etc we would have to use. She showed us this image as reference :


I then went away and found other underwater photography that use darkness in their pieces to get more of a feel to how it looks and how ours may turn out. This is kind of like a mood board of darker images.


Techniques used in Fields and Frames and Dance both intertwine with each other, and during our tutorial with Vicky she got us thinking more about the components we discussed in the Fields and Frames lectures and how they relate back to our film. 

Duration

Duration, as we learnt in lesson 2, is a measure of continuance. The duration of our film will be about 3 minutes. It will also be in slow motion as well, in order to achieve an underwater effect. This could also be seen however, to reflect how time slows down as they are in their final moments - similar to the idea that you see all you memories in a flashback. While in real time this would probably be very quick, for the person this could appear to be a lot slower in the dream like state before death.

Reflexivity

This is the process of film-making, such as camera and editing and making it the centre of attention. It can be self referential to this process. For our production we want to make the camera another dancer, rather than a separate physical object. It will weave it's way around the performance, and will reflect emotions and represent various actions as well. For example, at the beginning the camera will be spinning around the dancers, reflecting the chaotic-ness of their falling. It aims to add to the disorientating effect, along with the dancers movement (tumbling, spinning etc). As said before, it will be like the camera is another person, falling just like the dancers in view. This also references back to the poem.

In the movie Chronicle, there are several falling scenes that kind of show what I mean. The camera spins around, as it has no control over it. One of these moments can be seen at the end of the following clip : 


Perspective


Perspective is reflective of what the audience takes from the piece - their interpretation. To do this we're going to do a variety of different camera angles and positions. These are then gonna be viewed in a mixture of fast cuts (during the chaotic tumbling part) and slow paced ones (as they are floating in the second half of the film - representing the calmness and the relief of them being together).


Frame

It allows you to show instead of tell. It is like the boundary of the film, everything is confined to this. It can manipulate how you see things - a small frame can bring attention to a single person or small details while in a large frame, smaller things can get lost. In our film close up shots would be good at the beginning to show restriction, like the breathlessness of the characters as they are brought sinking down to their doom. As the piece progresses the shots will become wider to reflect that their boundaries have been lifted through death, and they are now free to be together forever.
Mollie, Katherine and I had a tutorial with Vicky to discuss our idea further and get more advice on where to take the project. The main question we had was how to get interesting camera movement, as we wanted to experiment more with this rather than just following standard shots. We discussed our idea of getting the camera to create the disorientating effect of the fall from the crash into the water, and how to get a tumbling effect. Vicky suggested creating a rig and to look more into Tony Hill, who often builds his own rigs for his work.

Downside Up // Tony Hill


Tony Hill : Perspectives


Tony Hill discusses various pieces of his work. The ones that I mainly thought were relevant to our project was Laws of Nature (1997) and A Short History of the Wheel (1992).

Vicky also suggested suspending the camera in the air somehow.

Water Works

Crystal Aquarium // Jane Park (1995)

We looked at Jane Park's piece Crystal Aquarium (1995) as another underwater piece. In her piece we saw the importance of the light and reflections and refractions on the face and the rippling effect of the water. It also gave us more of an idea of how bubbles come from the mouth and from around the body. We found the fact it featured her drinking (another liquid) underwater an interesting point in the video. You can watch the video here.


Neon Diver // Tina Keane (1990)


 - LUX 

I like how Tina Keane used the pool as a metaphor and I find this very effective. As they define the frame, this kind of reflects what we've learnt in Fields and Frames - the importance of framing and the building blocks that make up the final film being very important. This is something we will need to carefully think about for our film. 


David Hall // Tap Piece (TV Interruptions)


We re-visited this piece by David Hall that emphasised the importance of the frame, the edges of the camera's frames becoming the sides of the tank. We also reflected on the few moments of stillness after the tap is removed and made the point that making our video underwater may not mean making it blue, but clear. Water can be still and transparent, so not making it obviously underwater may put more of an emphasis on the way it's shot and the building blocks. 

Final Summary of Notes From Tutorial

  • Focus on basing the dance around the camera, instead of the camera around the dance
  • The importance of the building blocks such as framing etc 
  • Water is transparent - could be clear rather than blue - don't have to make it obvious it's underwater - leave that to the building blocks
  • Thoughts about the form of the film shape it right from the beginning
  • How do the other important components of the unit come into play - reflexivity, duration etc
  • Don't make it overly sentimental and romantic 
  • Doesn't have to be a musical soundtrack - could be a sound scape. Heightened sounds of ambient noises of water and what the couple are feeling. Use what you hear underwater as a basis. Heighten subjectivity. 
Reflections

I found the tutorial very useful and it gave us a lot to go away and think about. It was interesting seeing the works Vicky recommended to us and I went away and watched them again at home several times. As a group we were initially a bit confused about what direction to take the project, as so many opinions and options can be overwhelming. We are going to have a discussion about the best route to take and hopefully going away and thinking things over will make things clearer.   
Today we carried out several tests in G27 to see what will help us in post - production to simulate being underwater. 

Making clothing and hair move weightlessly using fans


We first tested this on the black screen. With Laura on camera, I stood in as model (because I had the longest hair) while Mollie used an ordinary desk fan to blow air at me. Right away we realised that an ordinary desk fan would not be enough, as you have to stand very close to the person in order to get a significant amount of movement in clothes and hair. We believe we will have to use something stronger such as a leaf blower, but more tests will have to be carried on this. We also found the fan to be most effective when positioned below the dancer, as this provided a nice lift to the hair, making it appear floaty.

Set up for testing the fan on black screen

We followed the same procedure but replaced the black screen with a green screen.

Testing the fan on green screen

Making bubbles (using a black or green screen)


The idea is to overlay the bubbles in post over the footage of the dance. The black/ green screen should then appear transparent and cancel everything out other than the bubbles themselves. We wanted to experiment with the different bubbles we could create, so to achieve this we placed the camera in front of a clear tub of water, so that the framing roughly matched the tub's sides. We filmed as I blew into a straw placed in the water. We also carried out this test in a wine glass, as a source that was more transparent and clear than the tub. We also tried dropping various sized stones from different heights into the tub / wine glass. We found that the latter method worked best, using larger stones from a greater height. 

Camera positioning

Set up for bubble tests with lighting

Closer look


Green screen attempt

Creating bubbles in tub

Wine glass blowing attempt

Wine glass dropping stones attempt

Particles Falling

To achieve a particle falling look, we experimented different methods using talcum powder and dry hair shampoo. This effect is also to be overlaid over the final dance footage. We tried dropping the talc directly from the bottle, but found this was too thick, so instead I placed some in my hands and rubbed them together, making it more evenly distributed. However we still found it quite thick and kind of resembled fine snow rather than particles. The dry shampoo was similar. It was also an issue that the particles would only fall downwards instead of in random directions, so I tried to disperse them by waving my hand through them and blowing air towards their direction. This created more of a random effect, however it wouldn't last very long.

At the minute I'm looking into playing with the footage in after effects and further testing what we can do to simulate being underwater.

We want the dancer to look semi - casual, as the crash happens during an average day during everyday life, so there is no need to be dressed smartly. However after looking at underwater fashions shoots, and to help us fulfil the aim of achieving a weightlessness, we want the dress / dresses to be floaty and slightly glamorous. This means light weight and lots of layers is a must have. The dresses found have been similar to those which you may wear on a date night - smart, casual. We feel block colours would work best to contrast with the water. As for shoes, we feel pumps may be the best option to allow the dancers to be comfortable when they are moving. 

To focus more of the attention on the dance and emotions displayed, we want hair and makeup to be very natural - a plain face, with a tiny bit of mascara to make them pop and emphasise emotion. A natural, smokey eye may work well depending on the dress to make it more glamourous. The hair should be floaty, so a loose wave or braid would fit the style we want. 

Laura showed the following photos, as she is in charge of this area of design :


These are really good because it's nice to see we are all on the same train of thought and have a similar vision to how we want it too look. 

I decided to do my own mood board as well on this to have even more images and inspiration to go from. I dunno how helpful it is to anyone, but I enjoy doing them and researching different images and it helps me get a clearer image as well! 

Clothes Mood Board 


Make Up Mood Board


Hair Mood Board


We've decided that filming underwater is not an achievable goal at this stage. This is due to several problems :
  • Renting out a swimming pool is too expensive for our budget 
  • Pools are rented at incoherent times, such as in evening for only one hour
  • Finding a dancer that is comfortable with being underwater is hard - we're having problems finding a dancer as it is
  • Renting equipment for underwater is expensive and once again not in our budget.
This means that we will be focusing more toward the Dry For Wet technique mentioned previously. We are going to try and make this easier for ourselves by only taking elements from this. We are going to need :
  • A black room / room that can be made black / green screen room 
  • A strong fan
  • Something fine that can look like particles, such as lint
  • Camera that can do good slow motion
We have tests that involve these things planned for the 26th February in the photography studio, G28, to make sure that the technique will work okay and allow me to play around with the footage in practice for post-production. 

Aims for the next week
  • Test effects on both a black curtain and green screen
  • Use fans to try and create a weightless look for hair and clothing 
  • Look at this in slow motion to see if the feeling of being underwater is achievable 
  • Find and use different materials as particles to overlay over the final footage to make it appear more underwater 
  • Test lighting 
  • Play around with editing and ager effects to try and get a basic knowledge of how to carry out the technique.
To begin with we created a script that would get rid of the asteroid after being hit with a bolt. However this first script created would completely destroy the asteroid as soon as play mode was activated, only appearing in edit mode. To fix this bug we re-vised the coding, adding a debug. 

Original C# script

Game in play mode - asteroid automatically destroyed


Revised script with debug

However this did not completely fix the problem. When in play mode, boundary was missing from the Hierarchy. 

Missing boundary

To prevent this from being destroyed we added a tag. While selecting boundary in the hierarchy, in the inspector I used the drop down menu in the Tag section to select boundary, therefore tagging it as boundary rather than leaving it untagged


We then went back into the script to destroy the asteroids, removed the debug and replaced it with an IF statement, creating an endless loop where destroy would not be executed before being hit.


The result of this was that the asteroid was now visible in play mode, rotating. When a bolt was fired and hit the asteroid, both bolt and asteroid where destroyed simultaneously.

We then went on to create an explosion effect, when the asteroids were hit to add more realism, as objects do not just simply disappear when attacked. We went back into the previous destroy script and created a public GameObject to create the explosion. Then an Instantiate was also added to make sure the explosion happened in the exact same position as where the asteroid was.


The public GameObject code


Instantiate code


Complete script for the destruction of the asteroid

Next to add the actual explosion effect, I went to the folder VFX and then chose explosions. Then I dragged the selected explosion onto the destroy script in the inspector. This was so it would create a reference in the script.  

Folders for VFX

Explosion effects to drag to script

Effect successfully referenced in script

The result was that when the asteroid was hit with a bolt, a nice explosion effect would occur. 


Next we created a separate explosion for the spaceship crashing to distinguish this from the asteroid and make the game more visually interesting. To do this we went back into the script to destroy and added the following :

public GameObject


Instantiate for player explosion


Completed script with player explosion included

With Player selected in the Hierarchy, I changed the tag in the Inspector from Untagged to Player.

Tag changed to player

Similarly to before, back in the VFX folder, I dragged another explosion effect for the player into player explosion tab in the destroy script in the Inspector to reference the effect in the script and display it in the game. 


The result was a much larger explosion when the ship came in contact with the asteroid. 


The final step with the asteroid was to make it move towards the player and fall from the top half of the screen.  To begin with the Asteroid selected in the Hierarchy, I moved the Mover script from the Assets folder onto the Asteroid game object in the Inspector. 


Then in the speed tab I changed the value to -5. The negative value allows the asteroid to fall down the screen towards the player, rather than up.


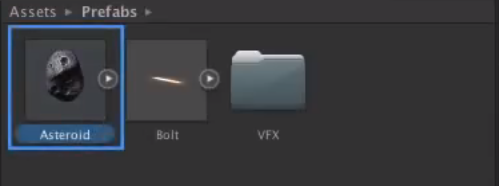
Next I selected the asteroid game object in the Hierarchy and dragged it to the prefabs folder in assets. 


Then the asteroid object in the Hierarchy was deleted. 


To begin  allowing spawning of multiple asteroids at once, we then added an empty object called GameController and tagged this, in the same fashion as earlier, as gamecontroller. We also added more coding to the GameController script. 

Tagged gamecontroller

Completed script for spawning random positions

This resulted in a single asteroid being dropped from a random point each time play mode was activated. 


Two examples of random spawn points

After coding some more, in the Hierarchy with Game Controller selected, the hazard count in the script in the Inspector was changed from to 10 to spawn multiple asteroids at a time.


Next we created coding so that we could have a delay between spawns. Then in the Game Controller script in the Inspector I changed the Spawn Wait tab to 0.5 and the Start Wait to 1. 


The result :


Completed code for spawning

Next we created a new script called DestroyByTime to be added on to the VFX explosion prefabs. 


To add this I selected the prefab explosion and then in the Inspector chose Add Component > Scripts > DestroyByTime.


Finally we changed the Lifetime value to 2 in the Script in the Inspector.