When we got to the room it took quite awhile to set up and arrange everything so that it would fit in the film editing room i.e. the space where we're working (it's quite small even without the equipment in it!). We also spent some time on the first day attending to the models after travelling, such as smoothing the skin out a bit more and re-arranging clothes to sit nicer on the body etc in preparation to get straight into shooting the next day. The room is set up with two lights on the left hand side at varying heights (acting as the sun), a tray holding the model on a rig, the set placed at a further distance away on the editing table, a blue screen behind the set for a digital sky in post, a tripod and camera directly in front of both model and set, the laptop with dragonframe running connected to and controlling the camera and a monitor for the animator to view positioning the model each frame. This can be viewed below :


We start animating a scene by looking at the animatic as seen in this screenshot : 


This gives us a better idea of what will be happening in the scene for us to replicate. 


At each frame (we're working at 25 fps) Tom had previously written down the syllables (taken earlier from our work on the indiegogo trailer) and over how many frames each movement would be over. In the screenshot below the big "E" alongside the arrow represents eyebrow movement (up or down) and the big "H" represents head movement. Seeing this at each frame allows us to work faster and generally better as we don't need to flick back and forth between the animatic and the live view etc. Also as shown below each sound can be heard at each frame, making it easier for us to place accurate mouths based on how Lawrence said certain words. 


This is the end of our first week of shooting, having about another week and a half remaining. I think we've learnt how fiddly stop motion can be (replacing mouths, fixing finger pressed skin, slight movement changes etc.) and even though I knew it'd be time consuming actually living it has reinforced this to me even more. We've been roughly arriving at 10am every day and most of the time working until 8pm when the caretaker often comes and tells us we're "the last ones in the building." Each day we're getting around 2-3 scenes done, each being about 5-7 seconds long.  We've had a few set backs (a light bulb blew, a hand fell off and a piece of hair snapped in two at one point) but we've always managed to work around them. Even though we're really exhausted (I can't stress this enough!) it's been so worthwhile and really fun at the same time. It's very rewarding seeing the character actually coming to life and noticing how our hard work has actually made this happen. Normally I'm very self critical of my work, but at the moment this isn't too bad! (I hope).


So let's hope the rest of the shoot goes smoothly! (eeeeep)


This armature was built in a similar fashion to the wire one in my previous post. Unfortunately I didn't get a lot of pictures of the process of building it, as all of my time was devoted to making it. I actually found this armature easier to build, despite it looking a lot more complicated, as no wire had to be cut to measurement etc. It was all about securing the ball and sockets to each other (using loctite adhesive. Once built, I applied the same foam onto the armature, securing with tape, to beef out the model while still maintaining flexibility and good movement. As seen in the photos, the armature only reaches to the end of the upper arm - this is because the lower arm and fingers are made using 1mm aluminium wire (in exactly the same way as my previous wire post). This is to allow adequate movement in smaller, more fiddly areas, not making the hands too big for the body. The lower arm was attached to the upper using loctite again. 


Requirements
  • 1.5mm aluminium wire (for legs and body)
  • 1mm aluminium wire (for arms and hands)
  • 2 joints (for breast and hip)
  • 2 steel with brass feet
  • 1 joint (for head)
  • 10 grub screws
  • 2 M5 bolts
  • 2 M5 washers
  • 2 M5 wingnuts 
  • Pliers 
  • Scissors


To make legs for the model, 3 1.5 aluminium wires were wrapped tightly around each other using 2 pliers. This was to add more strength and stability for when heavy clay is added later. 


A joint was place between the two legs to connect them and secured using some grub screws. The feet were also added in a similar manner at each end to make the model stand upright with no help.


Using 5 1mm aluminium wires, and using the pliers again, these were wrapped around each other tightly to make arms, leaving the ends free to be spread for fingers. 


A piece of wrapped (using three pieces of 1.5 mm) aluminium wire was placed into the hip joint and secured with a grub screw in the centre - the torso.


Joints for the head and breast were added, attaching the arms with 2 grub screws (one on either side). These were bent in a way to create shoulders, as seen in the photos. 


So as to not make the model too heavy, I added a light foam to the body, moulded around the ligaments and secured with tape. This means the model's body is plush, while the head, lower arms, hands and feet will be made of clay. 


The final model should measure around 270mm in height without the head, estimating 300mm with the head. This entire process was repeated a second time, creating two out of three models for the final production. 


After we did the trailer shoot, I took the files and edited a trailer in Avid for the Indiegogo page for Debbie. This consisted of a teaser trailer, followed by a pitch done by Lucy to give more information about the film and what we need.


The final edit can be viewed here :

For the Indiegogo page, I was in charge of compiling everything together and placing it in a relevant, interesting order. 

Firstly I had to come up with a tagline, that would promote the project and gain interest from the public when viewed on the home page of Indiegogo. I quickly summarised the project into a question to get the audience's attention and make them wonder more about it : "What is a day in the life on an animated character like? We want to find out and we hope you do too!"

For the main section of the page, after observing what other successful films that were similar to our own, had pitched, I came up with a running order as follows :

1) An interesting and quirky introduction, that is relevant to the film and talks directly to the audience. 

I wanted to set the scene with this section, giving a bit of a back story and showing our main aim for the film - to give characters a voice! It was written in a way that hopefully speaks more directly to the audience, to try and immerse them within the our film's world.

2) The Synopsis 

This was next on the list obviously to give a brief outline of what will actually happen in the film to the audience. 

3) Meet the Characters 

After so much work on characterisation I wanted to give the characters a proper introduction to the audience, by describing a short paragraph for each. This hints at events that happen within the film and acts as a bit of a teaser, as well as allowing the audience to get a sense of the personalities of the characters. Concept art for both CGI and Stopmotion is included in this section. 

4) Meet the Humans

I thought "Meet the Humans" would be a funny title after the previous one, playing on our reflexiveness within the project. I read on the Indiegogo website advice section about how it is good to introduce your crew, even in a personal manner, as people can often donate to people rather than projects. I thought personal statements would be a good idea for the audience to get to know us better and our relation to the film, so I wrote one for me and also for Katherine based from her learning agreement when she couldn't, and made Tom complete one as well. I hope the audience can see our passion for the project in these and it helps with the decision of whether to donate or not.

5) What we've already done...

Letting the audience know how far we have come so far and where we are at with the project. 

6) What we still need to do...

A time chart showing where we are and everything ahead of us. A short description about this as well.

7) Budget

This will show where the money will go to in bettering our project. A pie chart is also here to give a quick indication.

8) Perks 

A graphic version of the perks and a brief description of why we are giving what we are. 

9) Other ways to help...

Publicising us on social media and thank yous. 


Idea

I thought since our film is animation based it would be nice to do our trailer in a similar fashion and use animation. So far we have used quite a lot of graphics, such as of the characters, throughout much of our presentation materials (production pack, presentation etc.) and thought we could make use of them in the trailer. I thought about how we are bringing the animated characters of Chip and Clay into our world in Through the Medium, and how maybe we could reverse that to turn ourselves into animated characters and be a part of their own world, such is the reflexive nature of what we're trying to do.

Trailer Inclusions :
  • Motion graphic style animation 
  • Say my name, role and name of film
  • What the film is about
  • Talk about how the concept was developed
  • Introduce the characters - Clay and Chip 
  • How much money we will need
  • What it is going towards 
  • Thank you 
Based off of these bullet points I came up with a few paragraphs to include in the trailer and then we recorded me saying them to be put in the trailer. 

Animation and Lip Sync 

The trailer was animated in After Effects as seen below :


I'm very please with the result of the trailer, seeing as it was done in a very short time period - mainly working in the evenings for about a week. I think the style works well for what we're aiming to do and how the characters interact with it as well. It's amazing sometimes to see what can be done when you really knuckle down to something - hopefully all our efforts and passion for the project are being injected into everything we do, such as the trailer. 

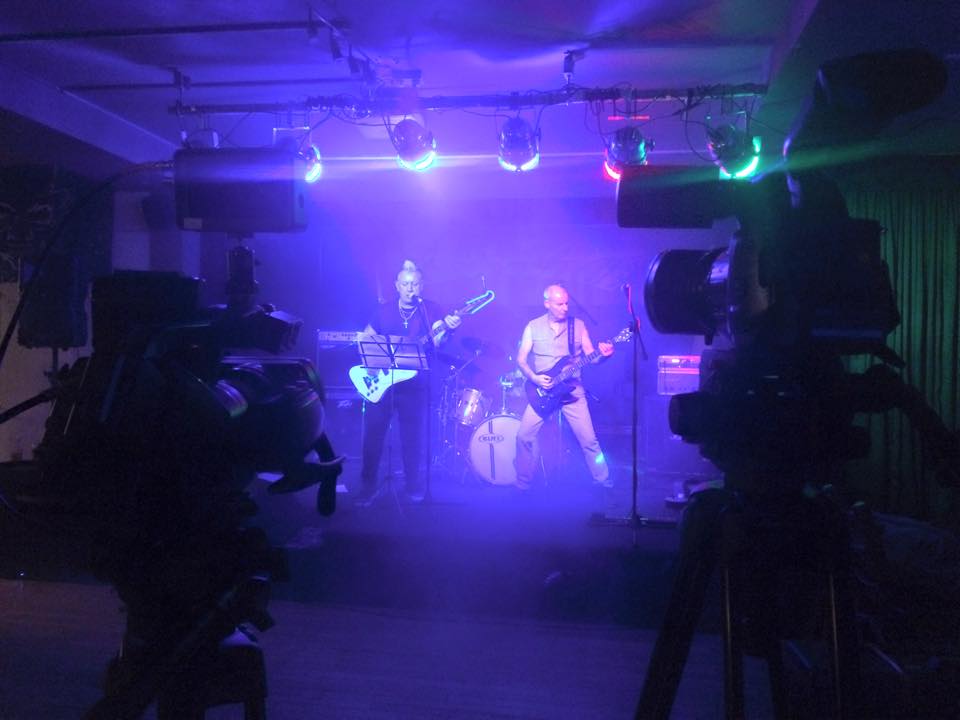
Josh asked Tom and I to help out with camera work for his documentary film, which I was very excited about as I find his project really cool and something I'd be really interested in! It meant we got to tag along and watch the performances and meet some band members which was super awesome! More film - wise it allowed me to test my camera skills on the EX1 - camera being something I haven't really been on other than in workshops and my own personal projects etc. It was nice being able to try something different and go a bit out of my normal comfort zone from roles that I've become more acquainted with. I had a great time and hopefully helped Josh a tiny bit on his way to accomplishing his amazing project!